Using Linode/Akamai for your S3 storage in Laravel
Implementing a S3 bucket from Linode/Akamai in your Laravel application
I've been working on an interesting SaaS project, where users can upload photos—lots of them. Therefore, I needed a storage solution, and since I am already using Linode (not affiliated), that's what I'll be using. In this post, I'll detail how I set it up in my project and how you too can get Linode's object storage integrated into your Laravel application.
Setting up Linode Object Storage
First, we need to set up a bucket on Linode. This is done by logging into or creating your Linode account. When
logged in, click on the Object Storage menu and from there click Create bucket. Give your
bucket a suitable name and select a region. Remember these values as they will be used later.
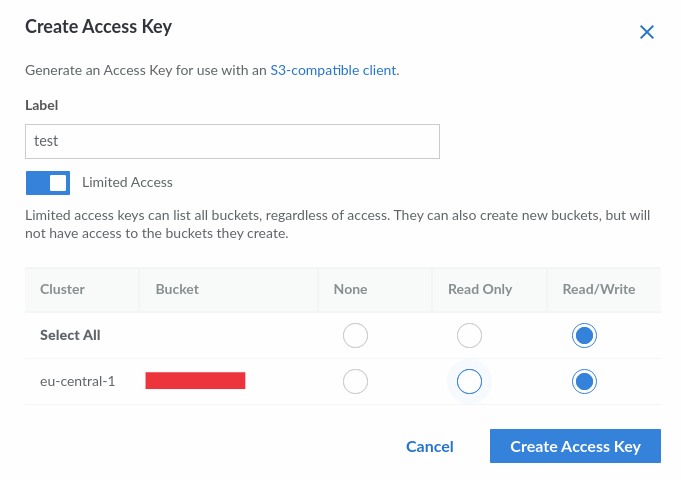
With your bucket created, click over to the Access Keys tab and click Create Access Key. In
the menu, select your newly created bucket and give it the desired permissions. This will give you your access key
and access secret, which you'll also need later.
This concludes the setup at Linode, and we can move on to the Laravel application.
Configuring your Laravel application
To use the Linode storage in your application, we need to set up a few things first. Since Linode Object Storage is S3-compatible, we can use the S3 driver in Laravel to manage files.
First, install the flysystem package in Laravel:
composer require league/flysystem-aws-s3-v3 ^3.0Next, set up some environment variables in your .env file:
LINODE_KEY=
LINODE_SECRET=
LINODE_ENDPOINT=eu-central-1.linodeobjects.com
LINODE_REGION=eu-central-1
LINODE_BUCKET=test
Fill in the information you got when setting up your bucket and access key. Note that LINODE_ENDPOINT is
comprised of the region and .linodeobjects.com (it doesn't include the bucket name).
Then go to your config/filesystems.php file and add the following to the disks
array:
'disks' => [

    'linode' => [
        'driver' => 's3',
        'key' => env('LINODE_KEY'),
        'secret' => env('LINODE_SECRET'),
        'endpoint' => env('LINODE_ENDPOINT'),
        'region' => env('LINODE_REGION'),
        'bucket' => env('LINODE_BUCKET'),
    ],

]
If you want to use Linode storage as your default storage, add this to your .env file:
FILESYSTEM_DISK=linodeTo verify the connection, you can run:
\Illuminate\Support\Facades\Storage::put('test.txt', '123');If the connection works, a simple test.txt file will be created in the root of your storage. If you run
into issues, consider adding 'throw' => true in config/filesystems.php to get more
detailed error messages.
Happy coding!


